Replacing my Media PC

Posted on 12 September 2015  •  Permalink  •  Category htpc

After five great years of service, mbox, my first HTPC, was starting to show signs of decay: a hard drive with bad sectors. A good time — ahem, excuse — to replace it. I wanted to go fanless five years ago, but the options were limited and expensive back then. However, with Intel’s latest Core M Broadwell series it is now possible to build a better performing, but also more power efficient media and server computer, without any fans.

Like I did for my original setup, I’ll document the process of setting up my new little box here as part of the htpc series.

Hardware

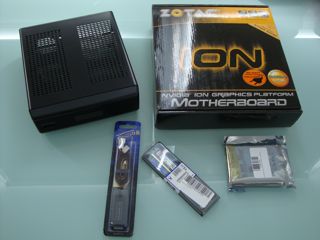
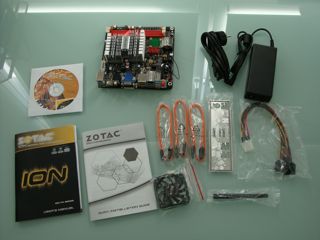
A good friend recommended watching out for the Zotac ZBOX nano series to be updated with Intel’s Broadwell CPUs. I took his advice and the moment it became availble, I ordered the following parts:

  1. Zotac ZBOX CI521 nano
  2. Samsung 850 EVO 500 GB 2.5” SATA III SSD
  3. Toshiba 5 TB Canvio Desktop External Hard Drive

At a grand total of € 716,49 it’s slightly more expensive than my previous setup, though that’s an unfair comparison, as my previous setup neither included 5 TB of external storage nor an SSD. After only two months of use I can confirm it has been worth every penny so far for me.

Installation

Installing Ubuntu server on this machine is as simple as downloading the 64-bit install image, and “burning” it to a memory stick. I used my Mac to create the bootable memory stick as follows:

hdiutil convert -format UDRW -o target.img ubuntu-14.04.2-server-amd64.iso
sudo dd if=target.img.dmg of=/dev/rdisk$N bs=1m

Where for $N you should use the device that holds the memory stick.

After I hooked up the Zotac ZBOX to an ethernet cable and my TV (I don’t have a spare monitor laying around, except for a display that requires Thunderbolt), I plugged in the memory stick and the system booted and installed smoothly. Working on a command prompt on a TV isn’t the most comfortable, so I instructed the installer to include OpenSSH. After just a few minutes I was remotely logged in to a freshly installed, fully working Linux system. Modern times.

Configuration

At first boot, I ran a dist-upgrade to get the latest and greatest software and security patches. I adapted .bashrc to my wishes (especially $PS1), and set locales to squash certain Perl warnings:

sudo update-locale LC_ALL=en_US.UTF-8 LANG=en_US.UTF-8
sudo dpkg-reconfigure locales

I use byobu a lot for running tasks in the background, or as a screen multiplexer when I’m logged in remotely. It’s installed by default with Ubuntu, but I usually tweak a couple of things. I enabled it’s custom colored prompt:

enable-byobu-prompt

Icconfigured the different status items, fixed monitoring the right ethernet adapter, set the network transfer units to bytes and set to monitor the right thermal device to show CPU temperature (of the first core). These settings can all be modified in ~/.byobu/status and ~/.byobu/statusrc. For the latter, these are the settings I use:

MONITORED_NETWORK=p4p1
NETWORK_UNITS=bytes
MONITORED_TEMP=/sys/class/hwmon/hwmon1/temp1_input

I use mDNS for easy reference to systems on my home network. With mDNS, machines in a network that support it can be resolved on the .local domain. It’s part of OS X and Ubuntu Desktop by default, but with Ubuntu Server the avahi-daemon package needs to be installed manually:

sudo apt-get install avahi-daemon

There we go, the new machine is now available using it’s hostname on the .local domain directly. That’s pretty much the most important configuration changes that got me where I wanted, so let’s turn this thing into a real media PC.

Kodi

I have been using XBMC — recently renamed to Kodi — from the moment I built my first media box in 2010. In my opinion it is the best open source media software. The installation instructions for Kodi for Ubuntu based distributions are as simple as:

sudo add-apt-repository ppa:team-xbmc/ppa
sudo apt-get update
sudo apt-get install kodi

Kodi needs an X server, which for this specific Zotac ZBOX works right out of the box (no pun intended) with the Intel specific drivers:

sudo apt-get install xserver-xorg xserver-xorg-video-intel

X11 needs to be configured in such a way that anyone is allowed to launch its own X server (I am going to create a specific kodi user for automatic boot later on). This can be done as follows:

sudo dpkg-reconfigure x11-common

I use nodm to login automatically and start Kodi on boot:

sudo apt-get install nodm

In /etc/default/nodm change the following values to enable it and to use the kodi user to login with:

NODM_ENABLED=true
NODM_USER=kodi

Unfortunately there is an issue between Plymouth and nodm grabbing terminals, which is why I had to apply the workaround described in this Ubuntu launchpad issue to get it working correctly.

With nodm set up, the kodi user that will login automatically needs to be added still. I set it up without a password, just to be sure. The next step is very important, otherwise Kodi will be severely limited (no hardware acceleration, no audio, etc.). The new kodi user needs to be in the right groups to grant it access to the resources it needs:

sudo usermod -a -G cdrom,audio,video,plugdev kodi

The final step to get Kodi to boot automatically, is to create ~kodi/.xsession with the following content:

#!/bin/sh
kodi

The new file needs to be executable:

chmod +x ~kodi/.xsession

There’s one thing I also set up for audio, which is alsamixer, because I still use an old stereo amplifier (which has served me well for more than 20 years already).

sudo apt-get install alsa-utils
sudo alsamixer

I mute all other channels except for the PCM audio and the set the master volume. With alsa-utils installed the mixer levels are automatically saved and restored on a reboot.

That did the trick for me, after all these steps you should have a full blown media PC.

Backups

Last but not least, since this box is also my home server, I use a very simple crontab to backup my most important assets, namely my git repositories. The backups have daily, weekly and monthly copies and are synced daily to a remote Linode VPS instance I own and manage. This is what my crontab looks like:

# Daily, weekly and monthly repository backups.
0 5 * * * rsync -a --delete $DIRECTORY_WITH_GIT_REPOSITORIES $HOME/backup/daily
30 5 * * 5 rsync -a --delete $HOME/backup/daily/ $HOME/backup/weekly
0 6 1 * * cd $HOME/backup/daily && tar cjf $HOME/backup/monthly/`date +\%Y\%m\%d`.tar.bz2 *

# Sync everything daily to my Linode VPS.
0 6 * * * rsync -a --delete $HOME/backup/*ly -e ssh $REMOTE_BACKUP_HOST:backup/

Replace $DIRECTORY_WITH_GIT_REPOSITORIES, $HOME and $REMOTE_BACKUP_HOST with whatever is applicable.

There’s one thing to configure to complete this setup, which is a simple mail server so cron can tell you when something is wrong. I have configured both Sendmail and Exim in the past, and I really don’t like to be remembered about that, so luckily there’s sSMTP:

sudo apt-get install ssmtp

Then edit /etc/ssmtp/ssmtp.conf and put in either your ISP’s SMTP host, or any other SMTP host you can send email from. The command line tool ssmtp can be used to test if it works.

Data

Besides the internal 500 GB SSD, I also bought a 5 TB Toshiba Canvio Desktop external 3.5” drive. Yep, 5 TB. Five. Terra. Bytes. For less than € 150,-. It replaces my 2 TB drive, which was chock-full, plus I wanted a USB 3.0 capable drive to connect to my new machine. So that’s going to be a whole lotta stuff to copy. More on that in a minute, first a word about partitioning.

I partitioned the drive using cgdisk with a GPT partition table (tip: I always used cfdisk so I like cgdisk a lot better than parted). I used a single partition with an ext4 filesystem covering the entire disk. However, I found ext4 reserved over 300 GB of space (for root, for system processes, and to avoid defragmentation) that is not counted towards free space. This external drive is for media only, so it’s definitely not needed to reserve space for system processes and certainly not 300 GB. As it turns out this can be tuned with tune2fs:

sudo tune2fs -m 0 /dev/sd$D$N

Use your specific device $D and partition number $N. Before running tune2fs the 4.6 TB sized drive, had 4.3 TB of free space. After running the above command, it shows 4.6 TB free. That’s better. Back to copying 2 TB of data.

The quickest way I know — and like — to copy large amounts of data from one system to another is using netcat. I normally use scp for most of my day-to-day data transfers, but for many gigabytes of data it does not make sense to encrypt everything, especially if you control the wire between the two ends. Here’s how I do it. On the one system move into the directory that you want to copy, and run the following command:

tar -cv . | nc -q 10 -l 45454

Go to the other system and fire up the following command:

nc -w 10 $REMOTE_HOST 45454 | tar -xv

Where for $REMOTE_HOST you need to use the hostname (thank you, mDNS) or IP address of the host you are copying from. Using netcat I got between 35 and 45 MB/s data transfer, from the eSATA connected 2 TB drive to the USB 3.0 connected 5 TB drive, using a Gigabit Ethernet connection.

With all the data present on the new disk, I added it to /etc/fstab to be automatically mounted. I like to put drives in /etc/fstab by UUID (to find the UUID of a partition, check /dev/disk/by-uuid/). As a result, I could re-use the external drive UUID entries from my old machine directly on the new machine’s /etc/fstab.

Silent, Cool and Low-Power

To conclude, some statistics. On the old system, the CPU temperature usually stayed close to around 76°C. Only on hot summer days or when in heavy use, the readings sometimes went above 80°C. The temperature would never go below 70°C, even on cold winter days with a room temperature of only 15°C. As for power use, the old machine used between 22 and 23 W when in use and approximately 20 W when idle. The old 2 TB external hard drive used 10 W when spinning, adding up to a total of 33 W when in full use.

The CPU temperature on the new system stays around just 54°C, the influence of room temperature seems to be pretty much gone, though I do not have readings on very cold winter days yet. The new machine is definitely much more power efficient; it uses only 9 W when idle. That includes 1 W of idle power the external drive draws when in standby mode. That’s only 8W for the PC itself, which is less than half of the idle power that the old system used. Playing music from the SSD with Kodi uses between 10 to 14 W. Watching a video from the external drive consumes between 17 and 22W.

So the new system is silent, cool and uses less than half the power when idle and about two-thirds of the power when in use. Not bad. Not bad at all.

Fix Static on XBMC Sound Signal

Posted on 27 October 2010  •  Permalink  •  Category htpc

After having set up XBMC, I loaded in all my music and video (where music actually was the most important, because my iPod was blasted by lightning). I already listened to several of my albums for a couple of days using my new and shiny mbox, after I started noticing a bit of static, especially during silences in a song, or in between albums when no music is playing.

I tried some things, fiddling with the cables that connect mbox to my amp, but that didn’t help, I did however find out that turning up the volume on the amplifier while no music is playing made it worse. So it must be something in the system I guessed.

I was a bit afraid that the static might be caused by a component, maybe the fan, or whatever. But fortunately when I fired up alsamixer I found the problem. Simply all and every channel was turned up to its loudest value. Even the input channels! After muting those input channels, the static was gone. Although it returned when I rebooted the system.

Turns out that the xbmc-live package installs an init script that contains some code that’s apparently the problem: on boot in turns each and every channel’s volume to it’s max, including the input levels.

Luckily this can be fixed quite easily. Edit /etc/default/grub, and from the variable GRUB_CMDLINE_LINUX_DEFAULT remove the setvolume constant from [list] in the xbmc=[list] argument. This will prevent the XBMC init script to screw up the volume levels.

Still it’s nice to store a decent mixer configuration and have that load up on boot. We can do that with ALSA as follows: first use alsamixer to set up the levels the way you want them, then to store the levels as the default configuration for next bootup, run:

sudo alsactl store 0

And that’s that, another problem fixed.

Setting up XBMC and iPhone as Remote

Posted on 08 October 2010  •  Permalink  •  Category htpc

After getting mbox up and running, it was finally time to put the m in mbox. This is going to be a very short post, because the guys over at XBMC have an excellent tutorial on their Wiki on how to get XBMC running on a minimal Ubuntu install. All I did was follow (a subset of) the steps over here. The walkthrough is pretty extensive, and like me, you might not need or want to follow each and every step, but the basic part to get everything up and running is in there and described in good detail.

The second most important thing for me was to be able to control XBMC remotely with my iPhone. Even before buying the components, I checked whether that’d be possible, otherwise I wouldn’t have been building mbox in the first place. But luckily some guys in Australia, under the name of collect3, have built a really nice iPhone app called XBMC Remote that does exactly what I want.

There were some problems with <record></record> showing up in album names with the latest XBMC release, however this has been fixed in version 1.7.7 of the iPhone app. So, again lucky me, because I don’t have to write all about the work around I used to use to fix that particular problem…

To conclude, I was pretty amazed of the power of both XBMC and the remote iPhone app. It just works! I’m already happily using this setup for over a month now, and I still have nothing really to complain about.

Coretemp and Byobu

Posted on 17 September 2010  •  Permalink  •  Category htpc

Being at the point to leave mbox turned on 24/7, I wanted a way to monitor it’s temperature. I installed a so called fan mate, with which I can manually adjust the CPU’s fan speed. So here’s what I did. First you need to install the Ubuntu package called lm-sensors to enable querying CPU temperature on the Zotac ION-ITX boards. Next make sure the coretemp module is loaded, either modprobe‘ing it manually or by adding it to /etc/modules to have it load automatically.

After doing that, type sensors to see the temperature of the CPU(s). Now that’s nice, but wouldn’t it be even much cooler to add a temperature display to byobu? That’s what I’d think. So create a file 5_sensors in ~/.byobu/bin, make it executable and fire up your favorite editor to add the following content to it:

#!/bin/bash

t=`sensors | grep "Core 0:" \
  | sed -e 's/Core 0: \++//' \
  | sed -s 's/\.0°C \+(crit.*).*$//'`

if [ $t -gt 49 ]; then
  color="kR"
else
  color="kB"
fi

printf "\005{= %s}%s\005{-}\005{= kw}\260%s\005{-}" "$color" "$t" "C"

There you go, fire up byobu and you’ll see a new field appear (make sure to enable the “custom” status notifications, by pressing F9 for the byobu menu, go into “Toggle status notifications” and check “custom”). I use color red for a temperature above 49 degrees, which is encoded in the if statement. Feel free to change it however you like!

Building a mini-ITX ION Based HTPC (2)

Posted on 12 September 2010  •  Permalink  •  Category htpc

Already a few Saturdays ago the last package of items arrived, so the unboxing could start. I thought to include some images of the unpacking and assembly process.

Hardware

The total set of hardware I ordered

Actually the first time ever in my life to lay hands on a mini-ITX mainboard. I’d only seen them as images on the web (honestly). Some images of the assembly in progress:

Zotac ION ITX A-E package

Contents of the Zotac ION ITX A-E package

Mainboard installed into M350

Mainboard installed into M350 (1)

Mainboard installed into M350

Mainboard installed into M350 (2)

After finishing the assembly process, it was time to start setting up the software. I decided to go for a Ubuntu server install and without a CD or DVD drive I had to resort to an USB install. I first tried putting a full server CD install image onto an USB drive using UNetbootin and boot and install from that. Booting and everything went fine, but then I ran into problems installing from the USB drive, because of missing symlinks and truncated filenames. These problems probably were related to the fact that the USB drive needs to be a FAT filesystem (to boot). A quick search on Google showed me that I’m not the only one suffering from these issues.

The next try was to boot from USB but install from network. Again booting went fine, but setting up a wireless connection from the USB boot environment seemed to be impossible. Maybe it is possible, but I didn’t want to spend yet more time. So I was almost moving my new little media computer down to the living room next to the internet modem to connect it directly through a cable, when I had a new hunch. Maybe I can easily share my wireless internet connection from my MacBook to another PC using a cable… Connect cable, click, click. Open system preferences on my MacBook, click, click, click. Reconfigure network from installer. Woa, it works! Thanks Steve & co!

There we have it: mbox is alive. Up and running Ubuntu Server 10.04. But it’s not a real media box yet, still some more things to configure. Therefore, I’ve made a separate blog category named “mbox”. I’ll be writing more posts including how I configured a lot of things, and will all file them in there.

Setting up WPA2 Wireless

Posted on 31 August 2010  •  Permalink  •  Category htpc

After first setting up Ubuntu Server on mbox, apart from ethernet I wanted to set up WiFi too, so whenever I move it somewhere in the house where there’s no wired connections it can still connect to the network and the internet. From earlier experience I know setting up WPA2 can surely be a bit of a PITA. It took me a whole-lot-o-time to figure this all out, so at least for myself to remember, here’s how I did it.

For the Zotac board’s Atheros chip to work in Linux, you will need compat-wireless. After installing that, reboot, and automatically the ath9k module will be loaded by the Ubuntu kernel. Next install wpa-supplicant. Then edit /etc/network/interfaces and add:

auto wlan0
iface wlan0
inet dhcp
wpa-ssid <your-network-ssid-goes-here>
wpa-key-mgmt WPA-PSK
wpa-psk <your-plain-text-key-goes-here>

For added security you can make this file readable for root only, since your WPA2 password is in there unencrypted. There’s also ways to put it in there in an encrypted version, but I don’t really care since I’m the only user of the little box.

That’s it. If I’d knew all this beforehand, it would’ve saved me a whole-lot-o-time for sure.

Building a mini-ITX ION Based HTPC

Posted on 24 July 2010  •  Permalink  •  Category htpc

Motivated by a heavy summer storm, where lightning struck a tree in the front garden of one of my neighbors, killing my iPod, I’m building my very own HTPC. Besides my broken iPod, also the fact that the cost of compact sized hardware has dropped, was another reason to start looking into the option of building a little media box. Last but not least, having an iPhone that fits my entire iTunes library, I don’t need another portable music player anymore.

I’ve got several purposes planned for my media box, namely: to host my music library using Squeezebox Server, connect it to my amplifier and play music with it, connect it to my TV to be able to play videos with it — most likely using XBMC, and to use it as a little web server and source control server. With that in my mind, I pointed Safari to a couple of hardware web shops, and ordered the following hardware to start with:

  • Mini-Box M350 — Currently one of the smallest (if not smallest) mini-ITX enclosures, very suitable for fanless operation because of its design for natural air convection. I’m not planning on installing an internal DVD or Blu-ray drive, which would require a different case.
  • Zotac ION ITX A-E — A low power dual-core Intel Atom N330 @ 1.6Ghz operated mainboard, with nVidia ION graphics processor capable of 1080p video playback. Perfectly fits my needs. Should even be possible to operate fanless, but we’ll see how hot it will get when I finally put the pieces together. One of the nice things about this mainboard is that it comes with an integrated PSU, which saves you some money and installation hassle. Goes well with the M350 too.
  • Zalman Fan Mate 2— Just to be sure, when things get too hot, I can still install the optional fan that comes with the main board. With this handy tool it’s possible to reduce the fan’s speed to reduce the produced noise, because usually the fan doesn’t need to be running full speed.
  • WD5000BUDT — A 2.5” 500Gb Western Digital hard drive design for systems that are running 24/7. Low power, cooler operation and 32Mb cache.
  • Kingston 2Gb DDR2 — Running at 800Mhz, the highest speed supported by the Zotac board, I’ve only ordered one piece of 2Gb. I might consider upgrading to 2x2Gb to take advantage of the Dual Channel feature. But for now, I’m sticking with only one piece of 2Gb DDR2 memory.

The grand total of these 5 items was € 335.56. If I’d had to buy a new iPod Classic and docking station (which were both dead), that would’ve cost me € 278. So for an additional € 57.56 I now have a full-blown little media pc. Not bad. Not bad at all.